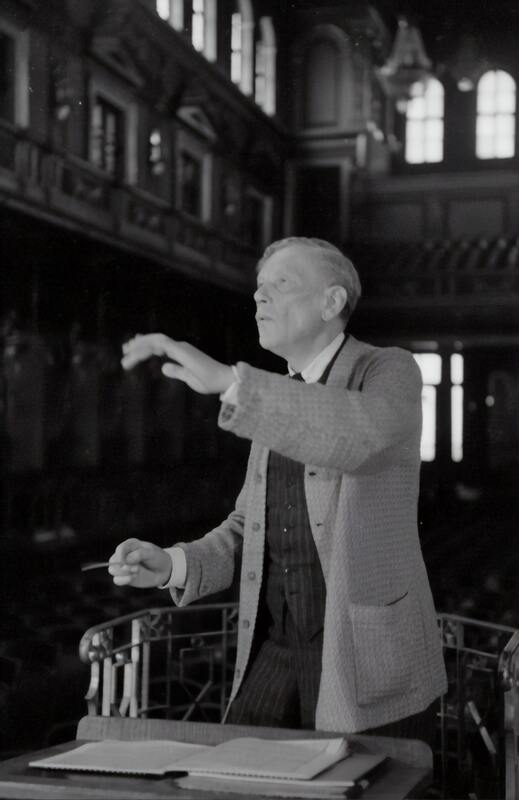
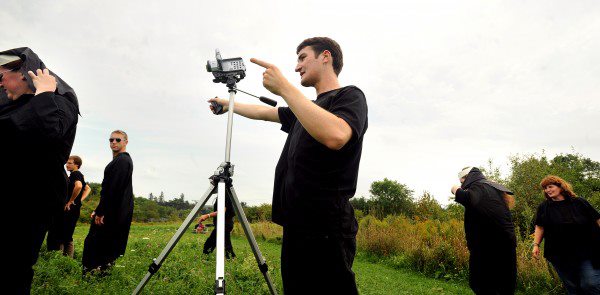
MichaelArell.com
  • Home
  • About
  • Blog
  • Buy
    • Christmas- Music for solo piano
    • St. Mary's Choir Favorites
    • SLIM Original Soundtrack
    • SLIM >
      • SLIM- Accolades
      • SLIM- Letter To The Viewer
      • SLIM- Behind The Scenes
    • Why Are Comedy Films So Critically Underrated?
    • Disorder In The Court
  • Donate
  • Contact
Search by typing & pressing enter

YOUR CART

Self-Directing

film director, independent film, movie making, support independent film, film history, music history, music theory, comedy movie
Thank you for visiting my blog!
Here I share what I have learned about my passions--teaching, music, and film.
Use the categories and archives features to sort posts.
Let me know what you think [email protected]

Categories

All Film Music Profiles Teaching

Archives

August 2021
July 2021
June 2021
May 2021
April 2021
March 2021
February 2021
January 2021
December 2020
November 2020
October 2020
September 2020

7/18/2021 0 Comments

Teaching- Opening Concert Band To Keyboard Players

Picture
Opening up concert band classes for piano and keyboard students is a wonderful opportunity to build your program. In this post, I include several tips for how to successfully include keyboards in a band setting. Often these instruments are excluded from bands and orchestras or only have a place in jazz bands. By not making modifications to include these instruments, we may be excluding students that want to learn music in an ensemble but also do not have the desire to switch from piano to another instrument in order to join an ensemble.

Picture

Tuning

The first consideration for the group is tuning. Unlike other instruments that have tuning that can adjust, we will assume that electronic keyboards are always on the correct pitch of A=440Hz. This description says that the A above middle C on the keyboard sounds at a frequency of 440 cycles (sound waves) per second. This means that instead of tuning the band to the oboe or 1st clarinet, the band should be tuned to the keyboards.

Picture

Learning The Black Keys

Unlike beginning piano lessons, students playing keyboard in band will need to incorporate black keys into their known notes early on. The black keys are not as scary as many learners seem to think. If the player’s fingers are curved properly at the best playing position, students will have no trouble reaching these keys.

Picture

Start One Handed

Unless a student has previous experience with piano lessons, I strongly recommend that students begin reading just one staff (usually starting with treble clef unless the student has experience with bass clef) and attempting to play the lines with just one hand instead of trying to double each part with two hands or read two staves with different parts. Since many band pieces favor flat keys, it can be helpful for students to play Bb with their left hand and then C, D, Eb, F, and G with the fingers on their right hand. This will avoid students having to start playing using finger crossings. Also, just because keyboards can play chords does not mean that keyboard students should have to play chords to start. A chance to play a familiar melody can be highly motivating.
Picture

Finger Crossing

Once students gain confidence, one technique that keyboard students in band will want to learn is finger crossing so that they can play beyond a range of 5 notes. The teacher can help students to explore finger crossing by giving each student a fingering chart and putting the fingering numbers over the notes, so Bb, C, D, Eb, F, G would be labelled 2, 1, 2, 3, 4, 5. Just this range and fingerings cover many approachable band pieces. Finger crossing is awkward for every student at first and you may hear many complaints. But the truth is smoother playing comes from finger crossing and not lifting the hand every few notes.
Picture

Range Can Reinforce Other Parts

One of the great things about including keyboards in your band is the range that the instrument has. Depending on your numbers and instrumentation, the keyboard can be used to reinforce other parts from the lowest notes to the highest notes. If you have a lot of keyboards, you can even split them up so that some reinforce the bassline while others play higher harmonies. If you don’t have many bass instruments, keyboards can add to the bass line. Even if the keyboard students have not learned bass clef yet, they can simply read it in treble clef and just move down the keyboard to the lower end. Likewise, if your group needs more sound on the high octaves, the keyboards can supplement that. One of the nice things about the keyboard is that every octave has the same key arrangement, so transitioning octaves is not difficult, especially if students follow the fingerings.

Picture

Dynamics

If your school has the budget, I recommend using keyboards in band classes that are touch sensitive, meaning the keyboard volume responds to how hard or soft a student presses the keys. In this sense, changing dynamics is more like percussion students than wind or brass players. Also remember too, that a keyboard cannot sustain notes for a long time without replaying a note. An organ setting for keyboards does allow for sustained notes, but without the touch sensitive dynamics. Another idea is that keyboards cannot crescendo or diminuendo on a single sustained note.
I believe if you give keyboard students the opportunity to participate in band, you will be pleasantly surprised and how they add to your ensemble.

0 Comments

5/24/2021 1 Comment

Teaching- Introducing Composition To Students

Picture
Traditionally, elementary school music students were not introduced to writing their own music until after several years of studying the fundamentals. In terms of some skills, that makes sense. Students learn how to add numbers before they learn how to multiply numbers.

On the other hand, think about how students are encouraged to create their own stories before they know how to spell every word or write a complete sentence. Also, think about how students explore working with colors before they know warm or cool colors or can even name all their colors.

There is no risk to having students experiment with creating their own music. There are also ways to make the experience frustration-free and enjoyable. Approaching the concept by way of an activity or process instead of a theory can help make composition an engaging time for students.

An easy beginner lesson for composing is to encourage students to create a variation on an existing idea. They could use percussion instruments to change a rhythm the way they would like it, they could take a limited number of notes (like B, A, G on recorder) and write a melody using just those notes, or they could sing a new melody to the same text.
Picture
Once students feel comfortable creating new music using variations, the teacher can extend the parameters to give the students more freedom. For example, the student could have more notes as choices but use the same rhythm. Another idea would be to give the students a box of different rhythm types that they can use in their creation.

As students’ confidence and abilities grow, the parameters can change. Students can practice writing music as they learn about different styles, composers, and cultural traditions. For example, a student might be challenged to write something to sound like Disco, Duke Ellington, or Samba music. If more advanced students have an understanding of chords and harmony, students can be asked to fit their music to existing chord progressions.

Putting parameters on a student’s focus can be very helpful, but if a student wants to push the boundaries, that is awesome and that should be encouraged.
Picture
As with many skills and concepts, technology can be a wonderful tool to encourage creativity. GarageBand is one program that I have used with my students to explore composition. The great thing about the program is that students can play their own notes into the timeline or drag and drop already written loops. The only downside to GarageBand is that it is only available for Apple products. So if your students use MacBooks or iPads, it can be downloaded for free.

For schools that use Chromebooks or Windows-based devices, Garageband is not available. The best alternative I would suggest is a cloud-based (online) program called Soundtrap. It is free with limitations or you can get the full version for a fee per student. Like Garageband, it has some pre-written loops that students can drag and drop or students can input their own sounds. It does not have the functionality of Garageband, but in my view is the best alternative for non-Apple devices.

Teaching students to write their own music should be a joyful activity for teacher and student. Creativity can be an exciting feeling and students of all ages will be very proud to share what they have made.

1 Comment

4/26/2021 1 Comment

Teaching- How To Have Class Discussions Without Hurt Feelings

Picture
Discussions--the opportunity for students to share their thoughts and opinions and to explore content at a deeper level can be fantastic. But how can we organize discussions so that they do not turn chaotic or devolve into arguments?

Just like we teach students how to line up, when to raise their hand, etc, we can teach students the procedures for a successful and respectful class discussion. In this post, I recommend several steps that have worked for me over the years.

1) Introduce mini-discussions with unemotional topics

No matter what age your students are, they can learn the procedures of a class discussion by practicing having discussions about really mundane things like chocolate vs. regular milk or pants vs. shorts. In this way, students work on taking turns, critical listening, and speaking to each other respectfully.

2) Have students use “I” statements to express opinions

By phrasing opinions with “I” statements of “I feel...”, “I think...”, “I like...”, it allows students to put opinions in the context of perspective vs. right and wrong. For example saying, “I do not like the music of The Beatles” sounds a lot different than “The Beatles are stupid”, but the student may mean the same thing. It may take some practice to put thoughts into “I” statements but the result will be much more respectful discussions.

3) Build upon the thoughts of others with “yes, and” connections

By using the phrase “yes, and…”, students are required to consider different perspectives without completely rejecting them as they would with a “but…” response. A good example could be Student 1: “Swimming is my favorite sport”, Student 2: “Yes, and Football is my favorite sport”. This example is simple, yet the same structure works with more difficult discussions that could easily turn into an argument. By continuing a classmate’s thought with “yes, and…”, the responding student admits that what the first student says is equally as valid as what they are about to say.

4) Get to the point when students can monitor their own conduct

Once the teacher establishes procedures for class discussions and the students have had opportunities to practice and learn the procedures, the accountability of following the established procedures becomes the responsibility of the students. In this way, students are actively aware of their own speech and relationship to others instead of reacting to a teacher overseeing their participation.

These four tips should provide you with great starting points for future class discussions.

1 Comment

3/1/2021 0 Comments

Teaching-What Music Should Students Study?

Picture
This is an excellent question that many educators ask. I believe it is a question that we should never stop asking. Having a standard repertoire is wonderful, but we must always reflect on the music we use for teaching to be sure we have not become stagnant. 

There are several ways that we can group music based on the focus of learning. Several examples are by composer, by era, by style, by culture, by concept (high and low, fast and slow), and by theme of the work.

For any of these categories, the teacher has to ask “by creating this category, what music are we including and what music are we excluding?”

Let’s say that we decide our unit will focus on Beethoven. So that automatically excludes music from other composers. But clearly we can’t study everything that Beethoven wrote. How do we narrow down which pieces to study? There are several pathways we can go from here. Perhaps, we decide to focus on Beethoven’s works that are most popular. How do we measure that? One great way is to see which pieces are most performed by orchestras and in recitals. You can often find these records from various classical music publications. But perhaps we want to focus on pieces that have been most influential for later composers. In that case, we would study the writings of later composers. As you can see, it is quite a process to select music in this way.

Picture
An alternative to this approach is to go in reverse order. Begin with the purpose or end goal of the unit. Are you searching for pieces to be performed at the end of the unit? Will students be creating a project to present? Or, are students going to use the studied music to inform their own creations? With this backwards design, we may have an easier time selecting specific works that will best serve our students.

Notice that so far all of the planning process is dependent on the teacher. This situation may be the most common way to select repertoire across the world. However, I wish to present an alternative to this approach.

The alternative is learner-centered or student-centered--and that is, we have students select the music that they will study.

Many may react to this statement with surprise. After all, our students do not have the years of experience with music and credentials that the teacher may have. However, it is important to remember that the music is for the purpose of our students’ experience, not our own experience.

By giving students a say in what we learn, we open to them the possibility of having control over their own learning. In my personal experience, student motivation is greatly improved when students study music familiar to them. 

Just like the teacher selection process, students can follow many different paths when selecting music. The teacher can present learning goals for a class and then students are tasked with finding music that fits those goals. Or to go a step further in the student-centered direction, the class as a whole determine their learning goals and find appropriate music that will help them reach those goals. 

After this process of creating learning goals, I will often have students anonymously submit music suggestions that they feel will help the class to meet learning goals. Then, as a class we listen to each selection. Depending on the group, we may verbally discuss the selections--how difficult the piece sounds, what may be challenging, what may come easily, how it would sound after practice, etc. If the group has a difficult time discussing thoughts without risking hurt feelings, I would have students submit thoughts anonymously. I often use Google Forms for this process. 

Picture
This process can take time and there is nothing wrong with it taking time as long as discussions are productive. By engaging in this process, students come to appreciate all that goes into selecting the right repertoire. 

By embracing the student-centered nature of repertoire selection, we also get to learn what our students enjoy. I have learned to never make assumptions about students based on their age. Very rarely does an entire class only wish to focus on current top 40 music. I have been introduced to so many different styles, eras, and cultures of music through this process that I learn as much as the students.

Also consider that the process can be a balance in which some selections are student selected and some selections are teacher selected. 

I argue that allowing for student-selected repertoire not only makes for stronger relationships with students in the spirit of collaboration but also sets up students to become more independent in their interactions with music and making musical decisions.

I encourage you to try this process with your students, even if it is just for one selection. I do not think you will be disappointed.

0 Comments

2/1/2021 0 Comments

Teaching- How To Teach Good Playing Or Singing Position

Picture
A lot of people have a misconception that only singers and players of wind instruments need to concern themselves with a good seated or standing position. But imagining a drummer sitting in a recliner or a cello player laying on the floor dissolves this misconception. Proper playing or singing position is critical for all musicians, not only physically but also psychologically for the performer and audience.

I will address the physical first. At its most basic level, singers and wind players do need to be concerned with the breathing mechanism and not obstructing it. The two extremes of a bad position--leaning forward or resting arms on the legs is actually squeezing a little on the lungs and abdominal muscles (depending on the age range of the students, I sometimes describe this as toilet position). The opposite, leaning back into the chair with hips forward means that muscles are working to prevent you from falling backwards (unless you literally are in a recliner) that do not need to be working to produce a sound.

To demonstrate this, I do it visually and really exaggerate it. For the leaning forward, I make it hard to breathe and sometimes fall forward out of my chair. For leaning backward, I often moan to demonstrate how much it hurts to hold myself up.

To describe proper playing position, I tell the students to sit so that they could stand up right away. Too far back on the chair and this becomes difficult. Leaning forward or backward, and this becomes difficult. When the students ask why they would need to stand up fast, I suggest maybe we would have a fire drill or a surprise ice cream party.

Picture
Beyond the air requirement for singers and wind players, we have the other physical requirements of playing an instrument that correct playing position is crucial. This involves different things for different instruments. For woodwind instruments, every key must be accessible to the player. This means that the arms and hands must be positioned not only so the player can reach the keys but so the players hands and arms do not grow tired due to holding them improperly. 

For orchestral strings, the player must consider the positioning of the hand for changing pitch as well as the bowing arm. For guitar, electric bass, and other fretted strings, one has to consider the position of the hand forming the chords and the hand picking or strumming.

For keyboard players, not only the height of the arms, but the curve of the fingers is important for good technique. For any percussionist, the height of their arms to the instrument and distance to the instrument determines success.

Beyond demonstration and explanation, how do we convince students of the importance of good playing position? The answer is to let students discover the benefits of a good position for themselves. Let them struggle a little and find out that it is harder to play when they hold their hand a certain way or slouch, etc. Obviously, if a student is just not getting it on their own, prompt them to adjust slightly and once they notice the difference, it is very likely that the student will continue to use the more comfortable and easier (proper) position.

Psychologically, having a position that is more “at attention” will encourage students’ minds to focus even better. It will also encourage audience members to pay attention to what they hear because they see performers at the edge of their seats and think “something exciting is about to happen!”

Teaching proper playing and singing position not only helps students to sound better, but they will look very sharp when performing :)


Picture
0 Comments

12/28/2020 0 Comments

Teaching- How To Explore Tempo, Dynamics, and More with Elementary Learners

Picture
Listening can often become a rather passive activity. That is not entirely a bad thing in the scope of life. Sometimes having music playing and just being is great. However, in the structure of a music class, it is rare that we want listening to be a completely passive activity. 

Expecting students, especially the youngest learners, to sit completely still and silent for several minutes while they listen to a piece of music can be unreasonable.

Instead, there are degrees of active things that students can do while listening.


Picture
One idea that a lot of different companies have published are called listening maps. Often, they go with classical pieces, but the idea can be easily developed for other styles of music as well. The listening maps have a visual for students to focus on that usually traces the form, instrumentation, and texture of a piece. When the sound changes, the visual changes.

A variation on this idea is to have students raise their hand, hold up fingers, or another physical sign when they hear a specific thing happen in the music. I like to use this when the piece we are listening to has some type of repeated melody like a fugue. Every time the students hear the theme start again they raise their hand. Keep in mind that fugues do not simply have to be from the Baroque era of Bach and Handel. A couple that I have found work well is “The Shark Cage Fugue” from the Jaws soundtrack and “Going The Distance” from the Rocky soundtrack.

Continuing with the visual element. For some pieces, watching a video performance of an orchestra, choir, or band may help to add a concrete, human element to something that is abstract. Listening activities like this can easily be connected to a unit on vocal range or instrument families.


Picture
The next category of active listening is different movements that can help with listening activities. To start simply, students can pat or tap the beat that they hear. This is especially good when the piece has tempo that gets faster or slower over time or stops suddenly. To add some variety to this, handheld rhythm instruments can be used. If you have a good enough sound system, students can use rhythm sticks, maracas, hand drums and still be able to hear the recording.

For exploring melodic contour or dynamic shape, having students trace the shape in the air with their hands can be useful. For slightly older students, basic conducting patterns can be used in much the same way. When older students get confident with simpler conducting patterns, it can actually help them to feel the organization of beats within a piece.

The most complex level of movement while listening can be full dances. Dancing is a natural activity that all young students seem to enjoy. When they get older, some get self-conscious, so modifying dance activities can help all students to feel comfortable. I like to do a balance of “free dancing”- meaning that students decide how they move based on what they hear and “structured dancing” in which students follow a set of steps like a line dance, circle dance, or ballroom patterns.

Picture
Like with any activity, I make sure to establish procedures for safe dancing from the beginning. The basic expectations that I use all have to do with safety: stay in your own space (so not moving all around the room; occasionally we will plan a conga line); keep all body parts to yourself, and keep feet on the floor (it is amazing how many students want to lay on the floor during dancing time and this is just asking for fingers to get stepped on). Once you establish the procedures and review them several times, dancing time comes with the expectations automatically.

One game that students of many ages love is freeze dance. This is a good way to guide students to listen to patterns if you pause the music at specific points. The students freeze when the music is paused and dance when the music plays. It is also interesting to pause the music at unexpected times like in the middle of a phrase and discuss why pauses during a phrase sound wrong.

A variation on freeze dance is hot potato, which works well for long pieces. I usually have a soft object that students pass from one to the next. Just like with the dancing expectations, we review procedures of not throwing the object before ever doing it.

When using simple modifications like ones I have mentioned, students are still listening to music (and may listen to pieces that last 5-10 minutes long), but feel like they are not just listening as their minds and bodies are active the entire time. I have found these activities are very successful and often, students look forward to them.

0 Comments

11/30/2020 0 Comments

Teaching- Greeting Students At The Door

Picture
One of the best ways to set a great tone for class and to build relationships with students is to be at the entrance to your classroom as students arrive. It is also one of the simplest actions you can take. Even if things get chaotic before a class and you aren’t as setup as you hoped you would be, spending just a couple minutes greeting each student is worth your time.

I am fortunate that in my music room, there is a long ramp that leads to the classroom door so I can see students arriving from quite a distance. Unless a group of students is held up in a previous class, usually they arrive at a manageable pace so that I can greet each of them by name. Saying someone’s name when you greet them has a great psychological effect on anyone. At the beginning of the year, when there are some students that you are just getting to know, the doorway greeting is a great time to either remember their names or ask “remind me of your name, please”. If you have students as their first class of the day, a nice greeting can really start off their day with a positive first impression.

Picture
Another great benefit of greeting students at this time is to ask them about things they have told you about from outside of class. For example, if a student told you they were going to have a soccer tournament last weekend, ask them how it went. If a student won a spelling bee the day before, congratulate them as they arrive. There is also nothing wrong with asking them how something related to class is going. Ask them how the note they are working on with their instrument is going. If they had a chance to listen to the example you shared, etc.

Greeting time is also a good time to remind one or more students about class procedures and expectations. If a student seemed to be talking out of turn a lot during the previous class, remind them of the expectation to be called upon before speaking. Don’t do this in a threatening way, but more of a collaboration between student and teacher to maintain a respectful class environment.

For my youngest students, I will often remind each one of them as they enter to walk to their assigned spot (I often use velcro numbered spots to assign places for the youngest learners). But because I am greeting them at the door, this procedure becomes one of making contact with students and not just telling them where to go. Think of it as hosting a fancy dinner party and inviting a guest to sit.


Picture
The space right outside the door where you are greeting students can also be a space if a student needs to take a break. If a student arrives to class upset about something and they do not wish to speak to you about it or go visit the school counselor, you can invite them to sit or stand right outside the classroom entrance until they feel ready to join class. This way, you can still keep an eye on them but they do not feel like everyone is staring at them.

If there is a task that you would like all students to do like fill out a survey, sign a thank you note, take an item, you can have a small table set up right outside or inside the classroom door. It is funny but I will sometimes literally put a table in the walkway so that students have to walk into it in order to forget to do what is on the table.

These are just some of the ways that greeting students at the door can help to build a stronger classroom environment. It is a super simple action that can go along way to building positive relationships with learners.


0 Comments

11/9/2020 1 Comment

Teaching- Alternatives to Recorder

school instrument, school music, music education, alternatives to recorder
Personally, I have never had an issue with recorders. I do wear musician’s earplugs when we play them and offer earmuff headphones for students to use. I have had students not like the high pitched squeal. I do still use recorders with my 3rd grade students but I also use several other instrument options for variety.

One option is pitched percussion, and what are specifically called barred Orff instruments. These instruments come in varying sizes. If you don’t already have a collection in your school, it is best to budget for them over several years. When planning for a purchase, there are things to consider:

Do you want a collection of several identical instruments or a variety of instruments of different pitch ranges and materials? The advantage of identical instruments is there is no stress for the youngest students when they don’t get the one they want. The advantage of different pitch ranges is students can explore high and low. The advantage of different materials (like metal or wood) can allow students to compare different ways of creating sound.

In addition, for all different types of barred Orff instruments, there are options.


glockenspiel, school instruments, school music, music education, music teaching
Soprano glockenspiel, the smallest instrument with metal bars, comes in at least 3 different styles that I have seen. Some have permanent (non removable) bars that allow the player to explore the C Major and A minor scales. This works when too many options could overwhelm students. Another style looks similar to a piano and has a full chromatic octave, so students can play in any key, but as I said above, more options may make these more complicated than they need to be. A third style has 8 bars of a major scale, but the bars are removable. Often, they come with Bb and F# bars that can be switched out to play in other keys. Another advantage to the removable bar style is that you can modify the instrument so only the notes needed are present. For example, if you are working on Mary Had A Little Lamb, you can leave 3 bars on the instrument and remove the rest, giving the students a much higher chance of hitting the correct notes and feeling successful.

Instruments like the glockenspiel are small, so one student per instrument will be needed. For classes of 25 students, you would need a set of 25, or you could have students trade off with half that many.

xylophone, school instruments, school music, music education, music teaching
metallophone, school instruments, school music, music education, music teaching
Looking at the alto range, I have only seen models this size with removable bars. With wooden bars, they are called xylophones and with metal bars they are called metallophones. Metallophones ring a lot longer and can be played louder. As long as students are reminded to play gently this shouldn’t be a problem, but occasionally an excited student plays louder.  

Xylophone bars are made of wood (some are now a synthetic material). The last time my school ordered some, I found that I had to sand the bottom of the bars a little. It would be rare that a student would ever touch the bottom of a bar, but I still didn’t want to risk splinters. These models are large enough that 2 students can share one instrument and both play at the same time (often the range is from C to A on the next octave). Just like with band or orchestral pitched percussion, it is important to teach students which mallets work with each instrument. After several reminders, my students have been trained to use rubber on the metallophones and yarn on the xylophones. I don’t use brass mallets with elementary students because they can be piercingly loud. 

Similar to the alto range, there are tenor and bass models of xylophones and metallophones. I would only recommend having these as part of a collection of different sizes. Unless your music classroom is very large, you will need to store these instruments when not being used. The bass instrument is about 4 feet wide by 2 feet deep, so even 12 would take up quite a lot of real estate. Consider too, the larger the instrument, the higher the cost. 

There are many accessories available for these instruments like storage racks and carts with wheels. Before assuming that you need all of these, consider your own situation and how you would store and move the instruments. In my classroom, I have several tables making an L shape in the corner and most of the larger instruments fit under those. The rest fit in a tall storage cabinet. For Kindergarten and 1st grade, I will place the instruments in front of the students. For 2nd grade and up, I demonstrate and teach them the proper way to hold and to carry the instruments and they become responsible for moving the instruments themselves. Even with Kindergarten, I make sure that every student is responsible for putting their mallets back on the tray. I believe that every amount of student responsibility at clean up time benefits students.


keyboard, school instruments, school music, music education, music teaching
Next, I will discuss electric keyboards. Just like anything, there are so many models and options available. Just like with Orff instruments, you need to decide whether you want variety in a collection or identical instruments. Either way, I would recommend that you find a model that is MIDI (Musical Instrument Digital Interface--turning sound into data) capable (most of them are) so you can one day connect them to computers and practice inputting notes with software. 

The big brands of keyboards today are Yamaha and Casio. Both make a good instrument. The only difference I have noticed is that Yamaha keyboards can work with 3rd party power adapters, whereas Casio keyboards have to use Casio adapters because the plug is a different shape. I always use the keyboards plugged in (that’s what power strips are for), because replacing batteries would be a full time job. I recommend 61 keys or more so that 2 students can play on a keyboard at the same time. You can also either purchase stickers for the keys to help students find the notes that they need. This past year, a fellow teacher was able to use a Cricut to make custom stickers.

In terms of making a first sound, keyboards may be the friendliest instrument. Students get excited at how easily they can start to make their own sounds and create or reproduce melodies. It’s never too early to introduce the C shape of the hand and demonstrate how much easier it is to reach the keys than with flat fingers. Decide ahead of time whether students will have time to explore sounds or if all will be set to the same piano sound. I recommend starting and ending the lesson with some exploration time and having the instruction portion be all the same sound. Otherwise, you will hear spaceships landing while students are trying to play Hot Cross Buns. 

One advantage to keyboards is that the students can be introduced to chords. Maybe once they have mastered the melody to a one chord song, they could play the chord with their left hand. Once you connect a keyboard to a computer through MIDI, there are limitless things that students could do. You may want to start with one main computer and students taking turns before you buy a MIDI cable for each keyboard.

ukulele, school instruments, school music, music education, teaching music
Moving into the string family, this past school year was my first year using ukuleles, and it was fantastic. My school got a matching set, enough for 25 students. I found for myself that I needed a concert size instead of soprano because my fingers were too big! 

One of the wonderful things about ukulele is that the C major and A minor chords only need 1 finger. I actually start the students with chords before we try melodies. With chords, we experiment with rhythm and strumming direction. I require that all the students use a pick, so that they are not tempted to pull on the strings. With just these two chords, we can discuss what makes a major or minor sound. To help students find where to put their fingers, I use color coded sticker dots for the different chords.

Introducing the students to the ukuleles is similar to any instrument. We started with learning how to properly open the case, how to safely hold the instrument, how to strum, etc. It was probably 2 weeks before we actually started learning chord shapes, but by then the procedures for using ukulele were automatic. There are many ways to learn strumming patterns, through echo games, reading upbow and downbow symbols, saying up and down as you play, etc.


guitar, school instruments, school music, music education, music teaching
Guitar is obviously larger than the ukulele. I have several teacher friends that have matching classroom sets of half size guitars. At my school, we had an instrument donation drive, so we have enough mismatched acoustic and electric guitars for a class of 25 to trade off. I would say the biggest difference from ukulele (besides the size) is that guitar has 6 strings, with different letter names than the ukulele. One modification is that, when strumming down (from the strings closest to your face, moving away from your face), you can leave out the lowest two strings and play with just the higher 4 strings to make chord shapes easier.

The next difference of guitar from ukulele is the material of the strings. Even though both ukulele and guitar may have some type of nylon, the distance that a student will have to press the string on guitar is more. Both ukulele and guitar have advantages, but I would say guitar has a steeper learning curve because of the differences mentioned.

These are just a few of the options you have for some variety when you don’t want to focus solely on recorders. In many ways recorders are great for getting students introduced to wind instruments, but can also be deceptive because instruments like clarinet, flute, saxophone will take a lot more air than a recorder requires.

Please let me know if you have questions and share your own experiences with recorders and other instruments in the comments.


1 Comment

10/5/2020 0 Comments

Teaching- How To Teach Rhythms To PreK Students

Picture
Sometimes we can be held back due to the fear that we have to know a concept completely before we try anything using that concept. As teachers, we can transfer this fear to avoid introducing concepts to our students. Over my years of teaching, I have learned to never underestimate what students of any age can do with the proper supports or scaffolding.

There is nothing wrong with beginning to understand how music is grouped as rhythms and how sound can be organized through time without first understanding fractions, time signatures, division, etc.

The way I introduce rhythms with PreK is to start with echo clapping. I simply clap a pattern and have students echo with the same pattern. With clapping, we don’t have to worry about the correct way to do it as we would with using a drum or another rhythm instrument, the students’ full attention can be on responding to what they hear. We may play this game for a couple of classes.

Next, I count aloud as I clap (1 2 and 3 4) and ask the students to echo the clapping and the counting. I do this before even explaining that we are putting notes in groups of 4. We may do this exercise several times before transitioning to the same thing with rhythm sticks and then hand drums. Sometimes, a student notices that I stop at “4” and that is great. If no one notices, that is okay too!

Once the students are confident echoing rhythms, we pass the beat around a circle. It starts with just the counting. I start by counting “1”. The student next to me (I would explain if we were going clockwise or counter clockwise) counts “2”, the next student “3”. This is how we then figure out that after we get to “4”, the next person will actually say “1” and we start over again. A student may get confused and say “5”. That’s nothing to worry about. Often, the student will realize what they have done and laugh. Simply start over again with 1. If needed, I demonstrate counting to 4 and starting over at 1 again. The next level of the exercise is to pass the beat and play instruments while counting.


Picture
After these exercises, I introduce what notes look like. We talk about how they have a circle part and then an up and down line. We don’t worry about what each part is specifically called or what each part means at this time.

I then show 4 quarter notes in a row. I would say “remember how we counted notes in groups of 4? Let’s count how many notes we see”. At this point, every student is desperate to show off their counting skills. So I call on one volunteer to count the four notes. But what about all the other students?? Everyone gets a chance to count the four notes! The repetition is really good for learning how rhythms work.

Next, I would change one beat to two eighth notes beamed together. At this point, students don’t need to know the specific names of the notes, that two eighth notes fit in the same beat as quarter notes, etc. I would simply ask “which notes look different in this picture?” Once again, a class full of volunteers will demonstrate their understanding. I would then say, “when we see two notes with a side to side line (beam) like this, we put the word ‘and’ after the number”. I then count the rhythm. Once again, if each student in the class wants to count each rhythm, that is fine. I make sure to count it in rhythm each time so that students hear the eighth notes as shorter than the quarter notes.


Picture
For several weeks, I will share 2 or 3 pictures of quarter and eighth note rhythms and have us count them as a class. The next step is to invite students to attempt counting a rhythm before we do it as a class. I have found about 75% of students are able to correctly count the quarter and eighth note rhythms at this point. I am not simply talking about memorizing the sequence of the notes as a group, but actually pointing at each note and saying a number or an “and”. With more practice visually, aurally (through hearing and echoing), and kinesthetically (through playing instruments), by the end of the year, I have found that each student is able to count simple quarter note and eighth note rhythms.

Sometimes very advanced musicians that have been performing for years forget about learning the basics. I know I cannot remember the first time I counted a rhythm. It was probably when I started piano lessons. I do have to admit that I didn’t understand time signatures until I was in middle school. My strategy with PreK rhythms takes away much of the complication and returns it to counting to 4 and recognizing pictures as symbols without having specific vocabulary that can muddle things up.

0 Comments

9/7/2020 1 Comment

Teaching- The First Requirement of Teaching

Picture
Teachers today have so many responsibilities. Not only are we responsible for educating students in their subjects, but also we are responsible for teaching the students how to be part of a class, how to manage their time, etc. In one 35 minute music class, outside of music concepts, we may be incorporating concepts such as procedures for entering the room, how to speak to classmates, how to listen when it is time, taking out instruments, putting instruments away carefully, personal space, using manners, and more.

Those in training to become teachers have a long road of preparation. I believe that by the time I completed my undergraduate program, I had somewhere around 160-180 credit hours. My program involved:

music courses- history, performance, theory, ear training, orchestration; 

music education courses- vocal and instrumental pedagogies, elementary methods, secondary methods; 

education courses- special education, multicultural education, curriculum and design; 

honors college courses- many of these replaced general education courses, but were 4 credits each instead of the regular 3; 

and I had a film and video minor which was about 15 credits.

I honestly do not know how I completed the degree in the time that I did. I did my student teaching (12 credit hours) as a 9th semester, so I technically received my degree in December, even though I marched in May.

The amount of preparation could be overwhelming at times, and while an undergraduate student in the midst of preparation, the end goal can sometimes get blurred. I had a very difficult time, personally, understanding how I would apply everything that I was learning. It wasn’t that I didn’t find the material important, the biggest issue for me was that future students were just a figment of the imagination, they had not materialized yet for me.

Long story short, there are so many things that college curriculums determine that someone must know before becoming a teacher. 

Picture
However you must learn through experience the most important requirement of a teacher--you have to care about your students.

It sounds so simple, yet I didn’t learn it until I started teaching. 

All of the theoretical knowledge meant nothing until I actually started building relationships with learners. The catalog of performance experience, music theory knowledge, historical practice, and more all served to build connections with my students.

Why do I arrive at school early to be sure everything is set up? Because I care how the lessons will go for my students.

Why do I follow up with a student that seemed to be confused with a concept? Because I care about that student’s growth and understanding.

Why do I question a student’s actions when they make an unhelpful choice? Because I care about that student and how it affects everyone else in the room.

Why do I modify assignments for students that need it? Because I care about that student.

Why do I pull a 13 hour shift on concert days? Because I want my students to have a positive experience in a performance setting.

What you learn in undergraduate music education programs may not reveal the full picture until you are in your own classroom. In college, you may laugh at learning 4 different ways to teach the same concept but then you are in the moment and have 4 different students that need their own way to learn each concept.

I don’t think anyone actually familiar with education can claim that the pay is high, but measured in the number of relationships you build and countless lives you change through your work, teaching is the most rewarding career I have ever known.


Picture
1 Comment

    Michael Arell Blog: Teaching, Music, and Movies


    [email protected]

Powered by Create your own unique website with customizable templates.